Roofing Maintenance

Honey Bees Roofing & Solar offers the best roofing maintenance advice in Fort Worth, TX and the surrounding DFW metroplex and neighboring towns.

The Importance of Roof Flashing: Types, Installation, and Maintenance
Roofing, Roofing Maintenance

The Importance of Roof Flashing: Types, Installation, and Maintenance

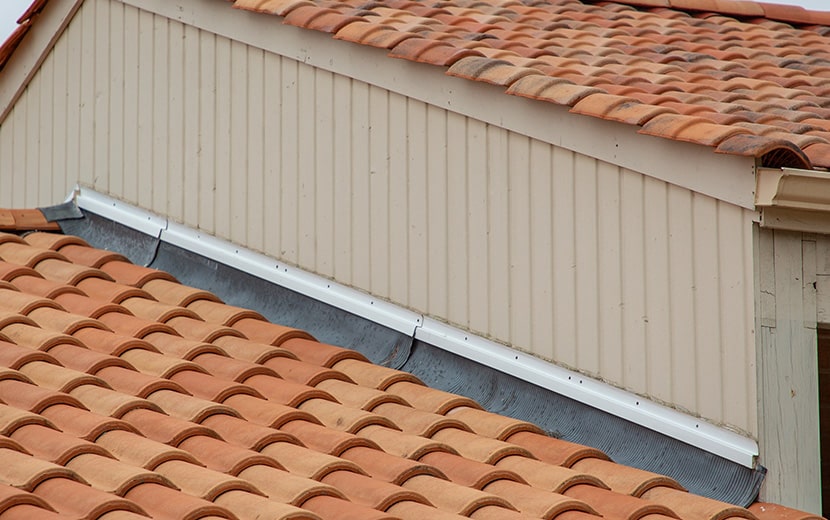
The Importance of Roof Flashing: Types, Installation, and Maintenance Water damage can lead to severe structural issues in your home if left unchecked. One of the most critical components protecting your home’s interior from external water penetration is roof flashing. Properly installed and maintained roof flashing is essential to ensure the long-term health and performance of your home’s roof. With years of experience as a trusted roofing and solar contractor in Burleson, TX, Honey Bees Roofing & Solar is here to provide expert insights into the vital role of roof flashing, the various types, installation processes, and essential maintenance practices. Roof flashing is a thin metal or plastic material installed to protect joints, seams, and edges of the roofing system where water might penetrate the inner portion of the house. These areas could include valleys, dormers, skylights, chimneys, and vents. Inadequate or improperly installed flashing can lead to leaks, which can further cause severe problems such as mold, mildew, and rot within your home. Selecting the most suitable flashing material for your home, ensuring proper installation, and committing to regular maintenance are all crucial factors in protecting your residence from potential water damage. The following guide, prepared by Honey Bees Roofing & Solar, will provide you with valuable information on the significance of roof flashing and how to care for this essential component of your roofing system. Getting a deeper understanding of roof flashing will set you on the path toward more effective protection against the elements and greater peace of mind for your home’s overall performance and longevity. Different Types of Roof Flashing Materials There is a variety of roof flashing materials to choose from, each with its unique benefits and drawbacks. The primary factors to consider when selecting a flashing material are cost, durability, and compatibility with your roofing system. Here are some common types of roof flashing materials: Aluminum: Aluminum is lightweight, rust-resistant, and relatively inexpensive, making it a popular choice for many homeowners. However, it can be prone to corrosion when in contact with alkaline materials like cement and paint. Copper: Known for its durability and resistance to rust, copper flashing is a long-lasting option that requires minimal maintenance and adds a sense of elegance to your roof. However, copper flashing can be more expensive than other materials and might require more skill to install. Galvanized Steel: This material consists of a steel base coated with a sealing layer of zinc to prevent corrosion. Galvanized steel flashing offers a balance between affordability and durability, but it may rust over time if the zinc layer becomes compromised. Lead: Lead is extremely malleable and resistant to corrosion, making it suitable for intricate rooftop structures. While lead flashing has a long lifespan, it’s more expensive than other options and presents potential health risks if not handled carefully. Essential Steps in Installing Roof Flashing Proper installation of roof flashing is critical to ensure its effectiveness in protecting your home from water damage. Although it’s recommended to hire a professional roofing contractor like Honey Bees Roofing & Solar for accurate and secure installations, here are the essential steps involved in the process: Evaluate the Roof: Inspect the roofing system for any damage and identify the critical areas, such as valleys, chimneys, and skylights, that need flashing. Select the Appropriate Flashing Material: Based on the type of roofing system, climate, and budget, choose the most suitable flashing material for your home. Prepare the Surface: Clean the area thoroughly, ensuring it’s free from debris and old sealants. The surface must be dry and smooth before applying the flashing. Install the Flashing: Depending on the area and type of flashing material, install the flashing using appropriate fasteners, adhesives, and sealants. Make sure the flashing is securely in place and adequately overlaps to prevent water penetration. Inspect and Seal the Flashing: After installation, inspect the flashing to ensure it’s properly adhesive and sealed to prevent water leaks. Regular Maintenance Practices for Roof Flashing Regular maintenance is vital to prolong the lifespan and effectiveness of your roof flashing. Here are some best practices for maintaining your roof flashing: Inspect Flashing Regularly: Conduct periodic inspections to check for signs of damage or wear in the flashing material, especially after extreme weather conditions like heavy rain, hail, or strong winds. Clean Debris: Periodically clear debris, such as leaves and dirt, from the flashing areas to prevent water buildup and potential damage. Check for Corrosion or Damage: Inspect the flashing for any signs of corrosion, rust, or other damage that could compromise its effectiveness in protecting your home from water penetration. Seal Exposed Edges: If you notice any gaps or exposed edges in the flashing, apply a suitable sealant to ensure protection against water infiltration. Contact a Professional: If you detect any significant wear or issues during your maintenance check, hire a professional roofing contractor like Honey Bees Roofing & Solar for a thorough assessment and necessary repair work. Addressing Common Roof Flashing Problems Here are some common roof flashing problems and how to address them: Improper Installation: If not installed correctly, flashing can be ineffective in preventing water damage. Hiring a professional contractor to assess and repair improper installations or consulting a professional during a DIY installation is crucial. Deteriorated Sealant: Over time, the sealant used to secure and seal the flashing may deteriorate, causing gaps and leaks. Reapplying a suitable sealant to the affected areas can resolve this issue. Mechanical Damage: Roof flashing can become damaged due to wind, ice, and other external factors. Timely repairs by professionals are essential to prevent further damage. Conclusion Understanding the importance of roof flashing, the different types of materials, and essential maintenance practices can significantly contribute to the long-term performance of your home’s roofing system. Proper flashing installation and maintenance can significantly reduce the risks associated with water damage, ensuring the protection and structural integrity of your home. By working with a trusted roofing contractor like Honey Bees Roofing & Solar, you can ensure that your roof flashing is
Secure Your Property - Proven Tips to Waterproof Your Roof
Commercial Roofing, Roof Inspection, Roofing, Roofing Maintenance

Secure Your Property – Proven Tips to Waterproof Your Roof

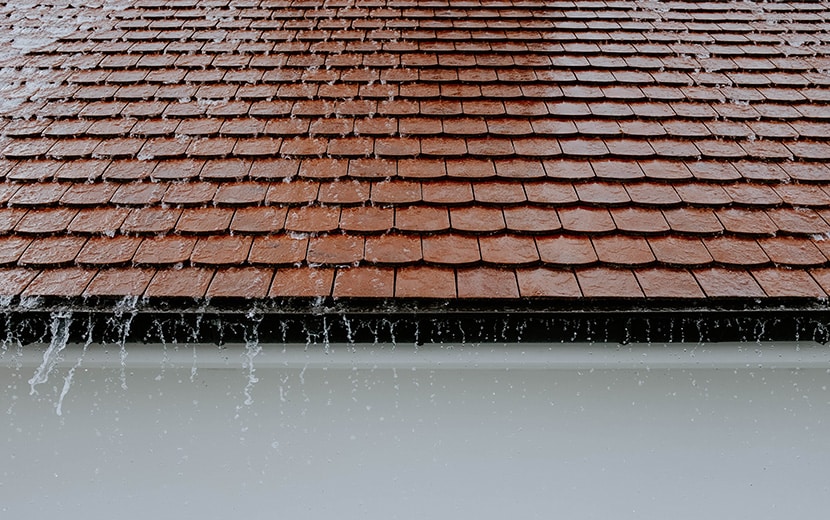
Water damage is a costly affair that can wreak havoc on your commercial property. It can lead to expensive roof repairs and even compromise the safety and integrity of your building. Waterproofing your commercial roof is a crucial step in preventing such damage and ensuring that your property remains in optimal condition. This blog will explore roof waterproofing, how often you should undertake this process, and some essential factors to consider when selecting the most suitable waterproofing solution for your commercial roof. The Importance of Waterproofing Your Commercial Roof Waterproofing is essential for any commercial roof, as it forms a barrier that prevents water and moisture from seeping into the building. This, in turn, helps to avoid the following issues: Structural damage: Water infiltration can weaken the building’s structure, causing wood rot, rust, and concrete deterioration. This may lead to costly roof repairs and potential safety hazards. Mold and mildew growth: Too much dampness creates an ideal setting for mold and mildew to flourish, potentially resulting in unhealthy air inside the building and posing health hazards for those living or working there. Insulation damage: Wet insulation loses its effectiveness, leading to higher energy costs and an uncomfortable indoor environment. Roofing system failure: Water damage can cause the roofing system to fail prematurely, leading to costly replacements and potential business interruptions. How Often Should You Waterproof Your Commercial Roof? There is no one-size-fits-all answer to this question, as the frequency with which you should waterproof your commercial roof depends on several factors, including the type of roofing system, the quality of the materials used, and the local climate. However, as a general rule of thumb,  professional roofing contractors recommend waterproofing your commercial roof every 5-10 years. Factors to Consider When Waterproofing Your Commercial Roof Roofing Material: The type of roofing material you have will determine the most suitable waterproofing solution. For example, metal roofs may require a different waterproofing product than asphalt or single-ply roofs. Discuss with a professional roofing contractor to determine the best approach for your specific roofing system. Climate: Roof waterproofing solutions should be selected based on the local environment. For instance, if your commercial property is located in an area with heavy rainfall, you may need a more robust waterproofing system that can withstand the constant onslaught of water. Similarly, select a waterproofing solution with excellent thermal resistance if your building is situated in a region with extreme temperature fluctuations. Drainage: Proper drainage is crucial in preventing water damage. Ensure that your commercial roof has an adequate drainage system in place, and regularly inspect and maintain the drains to prevent blockages and ensure the efficient flow of water. Warranty: When selecting a waterproofing solution, consider the warranty offered by the manufacturer. A longer warranty period typically indicates a higher-quality product that will provide long-lasting protection for your commercial roof. Budget: Waterproofing your commercial roof is an investment; however, it shouldn’t break the bank. Research various waterproofing products and solutions, and compare their costs and benefits to determine the most cost-effective option that meets your requirements. Twice Yearly Inspections Keep the Costly Repairs At Bay The most effective way to prevent your commercial building from experiencing a leaky roof is to ensure it undergoes an inspection at least twice annually. Regular inspections can identify potential problems before they become major issues, saving you money in the long run. During these inspections, a professional roofing contractor will assess the overall condition of your roof, looking for signs of damage, wear, and potential leaks. They will also check for proper drainage and ventilation, as well as any other factors that may contribute to roof leaks. This is incredibly important because issues with your roof might not be visible to anyone other than an expert roofer. Furthermore, if a roof technician doesn’t physically examine your roof for faults, the problematic areas could deteriorate as weather conditions worsen over time. Conclusion Waterproofing your commercial roof is a vital maintenance task that should not be overlooked. Contact competent roofing companies to discuss your specific needs and ensure that your commercial roof remains in optimal condition for the following years. At Honey Bees Roofing & Solar, we pride ourselves on being among the top Fort Worth roofing contractors, ready to cater to your requirements. Our skilled experts are dedicated to offering top-notch work at reasonable prices. Our goal is to deliver the finest service at a justifiable cost. Contact us today to set up your free roof inspection.

Why You Need Preventative Roof Maintenance for Your Business
Commercial Roofing, Roof Inspection, Roofing, Roofing Maintenance

Why You Need Preventative Roof Maintenance for Your Business

The roof of a commercial building is an essential component of the structure, and it plays a vital role in protecting the building’s contents and occupants from the elements. However, the roof is also one of the most neglected parts of a building, and this can lead to costly repairs and replacement. Preventative roof maintenance is one of the keys to ensuring that the roof remains in good condition and performs its intended function. This article will provide an overview of preventative commercial roofing maintenance. What Is Preventative Roof Maintenance? Preventative roof maintenance refers to the regular inspection and commercial roofing repair to ensure it is in good condition and performing its intended function. The goal of this service is to identify and address minor issues before they become major problems that require costly repairs or replacement. Benefits of Preventative Roof Maintenance Cost Savings: Regular maintenance can help identify and address minor issues before they can significantly impact your daily life. This way, you can fix them immediately and avoid expensive repairs and replacements in the future. Extended Roof Lifespan: Proper maintenance can help extend the lifespan of a commercial roof by addressing issues that can cause premature deterioration. Improved Energy Efficiency: A well-maintained roof can help improve energy efficiency by reducing heat loss in the winter and heat gain in the summer. Improved Safety: Regular maintenance can help identify and address safety hazards such as loose or damaged roofing materials. Compliance with Building Codes: Proper maintenance can help ensure that a commercial roof meets current building codes and regulations. Preventative Roof Maintenance Checklist Inspect the roof for signs of damage, such as cracks, leaks, or missing shingles. These issues can lead to water damage, mold growth, and structural damage. Clean the roof of debris, such as leaves, branches, and dirt. Debris can clog gutters and downspouts, leading to water damage and leaks. Inspect gutters and downspouts for damage or clogs. Clean them as necessary to prevent water damage and leaks. Check the roof flashing for damage or deterioration. Flashing is the metal material that seals the roof around vents, chimneys, and other protrusions. Inspect the roof for signs of wear and tear, such as cracks, blisters, or punctures, to prevent water and structural damage. Check for signs of mold or algae growth. These issues can lead to health problems and structural damage. Look for signs of animal damage, such as chewed or scratched roofing materials. These issues can lead to water damage and structural damage. Inspect the roof for signs of hail or wind damage. Like animal damage, these problems can also result in water and structural damage if not fixed quickly. Check the roof for signs of rust or corrosion as these can lead to leaks and structural damage. Inspect the roof for signs of sagging or unevenness. These issues can indicate structural problems that require immediate attention. When to Perform Preventative Roof Maintenance Preventative roof maintenance should be performed on a regular basis, typically every six months. However, the frequency may vary depending on the age and condition of the roof, the climate, and the material for commercial roofing. For example, roofs in areas with heavy snowfall may require more frequent maintenance to prevent damage from snow and ice buildup. Conclusion Preventative roof maintenance is essential for ensuring a commercial roof remains functional and in good condition. Its benefits include cost savings, extended roof lifespan, improved energy efficiency, improved safety, and compliance with building codes. By following a preventative roof maintenance checklist and performing maintenance on a regular basis, building owners can help ensure that their commercial roofs remain in good condition and provide reliable protection for their occupants and contents. For quality, Fort Worth commercial roofing services, choose Honey Bees Roofing & Solar. Our team of experts has the experience and commitment to deliver exceptional workmanship. Contact us today to schedule a consultation and discover how we can assist you with your roofing needs.

The Importance of Cleaning Rooftop Dryer Vents
Roofing, Roofing Maintenance

The Importance of Cleaning Rooftop Dryer Vents

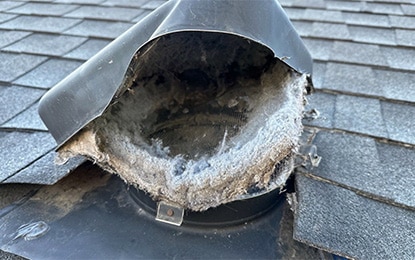
If you are like most people, your laundry room is one of the busiest rooms in your home. Between doing loads of laundry for your family and drying clothes after they have been washed, your dryer gets a lot of use. And if you don’t have proper ventilation, all of that hot air and moisture can build up, causing problems for your dryer and your laundry. That’s where a rooftop dryer vent comes in. Rooftop dryer vents are a vital part of any home’s ventilation system, allowing hot air and moisture to escape from your laundry room. Without proper ventilation, your dryer will not work properly, and your clothes may not dry completely. A rooftop dryer vent also helps to prevent lint buildup in your dryer, which can cause a fire. However, rooftop dryer vents still require maintenance, and Honey Bees Roofing & Solar knows all about the importance of cleaning rooftop dryer vents. Benefits of Having a Rooftop Dryer Vent There are many benefits to installing a rooftop dryer vent. Perhaps the most obvious benefit is that it allows hot air and moisture to escape from your laundry room, preventing problems with your dryer and your clothes. In addition, a rooftop dryer vent prevents lint from building up in your dryer, which is a fire hazard. By installing a vent, you can help to keep your dryer running smoothly and efficiently. If you are considering installing a rooftop dryer vent, there are a few things to keep in mind. First, you will need to make sure that your home’s roof can support the weight of the vent. Second, you will need to choose a location for the vent that is as close to the dryer as possible. This will help to ensure efficient ventilation. If you are not sure about a rooftop dryer vent, contact a roofing professional like Honey Bees Roofing for more information. The Importance of Cleaning Rooftop Dryer Vents Most people don’t give much thought to their dryer vents, but they can actually be a serious fire hazard. While a rooftop dryer vent can help prevent fires, there are other issues they run into. Lint and other debris can build up in the vent, blocking airflow and causing the dryer to overheat. A clogged dryer vent can also put unnecessary strain on the dryer, leading to premature wear and tear. For these reasons, it’s important to clean your dryer vents, no matter where they are, on a regular basis. Ideally, you should inspect the vent every few months and clean it whenever you notice lint or debris. There are a few different ways to clean a dryer vent, but the most effective method is to hire a professional. A professional will have the tools and experience necessary to safely and thoroughly clean your dryer vent, protecting your home from fire hazards and prolonging the life of your dryer. Call a Professional It’s important to clean your rooftop dryer vents on a regular basis to prevent lint build-up. But it’s not always easy to reach the vents, and trying to do so without proper safety equipment can be dangerous. That’s why it’s best to leave the job to a professional roofer. They have the experience and training to safely access and clean your vents, and they can also inspect your roof for any other potential problems. So if you’re looking for a way to keep your home safe and improve its energy efficiency, be sure to schedule an appointment with a qualified roofer today. If you’re interested in a roof inspection or would like help with your roof, then Contact Honey Bees Roofing & Solar online or give us a call today at 817–668-6131! We offer free roofing inspections so we can help you choose the best roofing option for your home. In addition, we can work on any type of roof and help you determine what may need to be repaired. If you need a free roof inspection, don’t hesitate to contact us!

Why is Roof Ventilation Important?
Roofing, Roofing Maintenance

Why is Roof Ventilation Important?

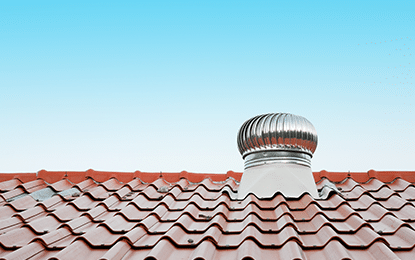
Keeping your roof in working order is critical when it comes to maintaining your home. Roofing ventilation is an important part of your home. Without proper airflow, your house can run into a variety of problems. But what exactly is roofing ventilation, and why is it so important? Honey Bees Roofing & Solar has the answers! What is Roof Ventilation? Roofing ventilation, also known as attic ventilation, is a series of intake and outtake vents. They allow airflow between the outside world and the attic itself. The vents themselves are put into the roof and make sure that hot air doesn’t get trapped inside the attic. Without them, the roof will trap air inside and cause a plethora of problems to your home. Why is Roof Ventilation Important? A lack of proper ventilation can cause heat and moisture to get stuck inside of your home. That causes serious problems to the home. These problems vary depending on the weather and climate of your area. However, they are all predictable. When it’s hot outside and the sun beats down on your roofing, it begins to heat up. The excess heat will age the shingles, which makes your roof’s lifespan significantly shorter. It also will warp the sheathing of your roof. The trapped heat will also make your energy bills go up, as it will become harder to keep the home cool. In cold weather, improper roofing ventilation is a major cause of ice dams. Humidity also gets stuck without roofing ventilation, which is a problem in already humid environments. Not only can the humidity damage the components of your attic, but it can also start the growth of mold. Improper attic ventilation can ruin important parts of your roof. What are the Signs of Improper Ventilation? There are many ways that improper ventilation can manifest, so if you see any of these signs it may be a good idea to get a roof inspection. With a roof inspection, a local roofer will be able to determine if your ventilation is working properly. Keep an eye on your heating and cooling bills. If moisture is trapped and damages your attic insulation, your home will struggle to keep its temperature. If your HVAC system is failing more consistently, it might be from the strain of additional workload. Ice dams during the winter months are a sure sign of improper attic ventilation. Warping of your roofline from the excess heat. Signs of water damage in your attics, like rust, dampness, water stains, or frost can all be evidence of additional moisture Call a Professional If you need better roofing ventilation in your home then Contact Honey Bees Roofing & Solar online or give us a call today at 817-668-6131! We offer free roofing inspections so we can help you choose the best roofing option for your home. We are also one of the leading solar installers for the Burleson, Fort Worth, area and can help you take steps to have one of the most energy-efficient options possible. If you want to have a lower energy bill, keep your home cooler, or help the environment with energy-efficient roofing options then don’t hesitate to contact us!

Remove Dead Tree Limbs From Above Your Home
Roofing, Roofing Maintenance

Remove Dead Tree Limbs From Above Your Home

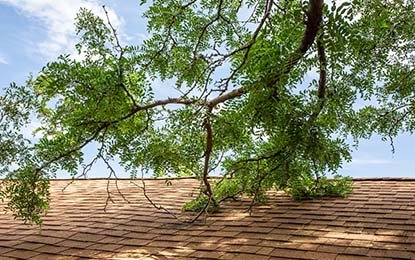
Trees are beautiful and can complement any house. They provide shade and they even make oxygen. However, over time they require maintenance and care or they can cause problems for your house. Tree limbs can die while still on a tree, making the branches more brittle and prone to breaking. It can be due to disease, storm damage, or even the age of the tree. These dead branches can fall onto your property, doing serious damage. It’s important, as a homeowner, to know how to remove dead tree limbs from above your home. What Can Tree Limbs Do To a Roof? Tree limbs can cause serious havoc to your home if they fall onto your roof. Small and medium tree limbs can puncture your roof, causing holes that will soon be leaking. If a bigger tree branch falls on your home, it can easily cause serious structural damage to your roofing. If the tree limb is big enough it can even cause your home’s roof to collapse. No matter what size branch, you’ll want to avoid them falling onto your roof. How Far Should Tree Branches Be From a House? A good rule of thumb is to keep trees between ten and twenty feet away from your house. At that distance, you may not have to worry about any overhanging branches. However, if you do have branches that hang over your roof or electrical lines, you’ll need to take precautions. Any branches that overhang your roof, or could grow to overhang your roof, require trimming and maintenance. How Can You Remove Dead Tree Limbs From Above Your Home? Cutting down tree limbs makes for hard and potentially dangerous work. The first step is to get thick nylon rope and tie it to the branch you’ll be removing. The number of knots you’ll need to tie on the branch depends on the weight and size of the branch itself. Larger branches will require many knots, while smaller branches will only need one or two. Then, tie the other side of the rope away from the house, anchoring it so the branch will be pulled away from your home. Next, you’ll want to find the branch collar. At the base of the branch, there should be a section of the tree that is thicker than the branch itself. That’s the branch collar. You’ll want to cut the branch on the thinner side of the branch collar, so the tree can properly callous after the trimming. Once you’ve found the right area, and have the branch secured so it won’t crash into your house, you’ll be all set to start cutting. On the smaller side of the branch collar, cut downwards on the branch. Cutting downwards helps prevent the tree from having water set into the wound. If water does set into the tree then the tree can begin to rot. Once the branch is cut, it’ll only be held on by the support rope. You’ll need people on the ground to help pull the branch away from your roof. Once the limb is on the ground, you’re all set! Call a Professional to Remove Dead Tree Limbs From Above Your Home While removing dead tree limbs is doable, it can be easy to mess up and hurt yourself, your property, or the tree in question. It’s also possible to do serious damage to your roofing while pruning and trimming your trees. Your best option is to call a professional who can remove the dead tree limbs for you. Honey Bees Roofing & Solar offers free roofing inspections so you’ll know if you need your tree’s limbs trimmed. If you need a free roof inspection, or just want more information about your roofing, Contact Honey Bees Roofing & Solar online or give us a call today at 817-668-6131!

Fall Maintenance Tips to Prepare Your Roof for Winter
Roofing, Roofing Maintenance

Fall Maintenance Tips to Prepare Your Roof for Winter

The days are getting shorter and the air is getting colder. That can only mean one thing, winter is on its way. Sooner than you think the weather is going to turn. There are only a few months to prepare. With that in mind, we’ve put together some fall maintenance tips to prepare your roof for winter. Why Should I Do Fall Maintenance? Fall and, more importantly, winter both come with serious changes to the weather. The wet and cold combo the darker months bring is the perfect storm for roofing damage. In the wintertime, small issues with your roofing can easily be exacerbated into large problems. The best way to prevent damage to your roof is to get it checked before things can get worse. If you do some fall maintenance then you’re far more likely to have no problems this winter. Fall Maintenance Tips Clear Gutters One of the most important fall maintenance tips to prepare your roof for winter is to make sure your gutters stay clear. During the fall, your gutters can easily fill up with leaves and other debris. When your gutters are full, they can’t properly drain water off of your roof and away from your home. This can easily lead to leaks in your roof or even into your foundation. If you hate cleaning your gutters, consider installing gutter guards to keep debris out of your gutters and keep the flow going. Cut Back Tree Limbs If you have any trees near your house, you’ll want to take a good look at where the limbs hangover. If you have a tree limb over your home, it can do damage to your home. The high winds of winter storms can do enough damage to the tree to have the limb fall off. If that limb falls onto your house it will do a ton of damage. Trimmed trees significantly lower that risk. Get a Free Roof Inspection The best way to prevent damage to your roof this winter is to get a roof inspection. A professional roofer will be able to find any problems with your roof and fix them before they get worse. Things like damaged shingles can turn into major roofing damage. During the winter water can get under the damaged shingles and refreeze, which causes more damage. Over time, your roof will start to leak more and more. A roofing inspection lets you catch the damaged shingles before they can lead to a full-blown leak. Having a free roofing inspection also saves you from trying to get onto the roof and look for yourself. A local roofer’s expertise will be able to catch things you may even miss. During the fall you should absolutely do some maintenance to prepare for the winter weather. If you make sure your gutters are clean, your trees are trimmed, and your roof is in top condition then you’ll be ready for this winter. Honey Bees Roofing & Solar offers free roofing inspections so you’ll know if your roof damage can be fixed, or if it’ll need to be replaced. If you need help with roof repairs or replacement, or just want more information about your roofing, Contact Honey Bees Roofing & Solar online or give us a call today at 817-668-6131!

How To Prepare Your Roof for Hail
Hail Damage, Roof Repair, Roofing, Roofing Maintenance

How to Prepare your Roof for Hail

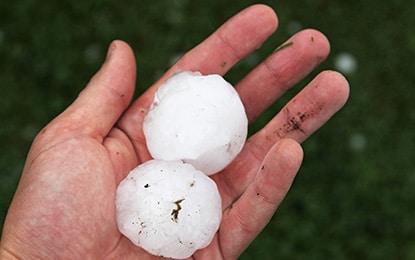
Springtime brings many wonderful things. Fresh flowers, warm weather, and longer days all start appearing after winter has left. However, storms don’t leave with the cold season. In fact, storms can get even meaner with an increase in hail. Hail is no joke, it can easily turn a nice day into frustration and property damage. Texas has the highest number of hail events in the nation. You can prepare for these storms to more easily weather their effects. Honey Bees Roofing & Solar has tips to help you learn how to prepare your roof for hail. How to Prepare your Roof for Hail Check for Previous Damage Your roof has most likely weathered storms before, so it may have previous damage that needs to be fixed. Any pre-existing damage will most likely worsen if not fixed. Look for any areas of the roof that may have damage. Shingles may be torn or have lost granules. Flashing is around the key areas of your roof to prevent water from reaching anywhere it can cause damage. Replacing damaged flashing is a high priority. For assistance in checking your roof, we offer free roofing inspections. Trim any Tree Branches During a storm, tree branches can break away from their trunks. They can easily do damage to your roof. Make sure you have no branches hanging over your home. You might be able to trim little branches yourself, but consider getting a professional for large branches. Loose or dead branches have a higher chance of falling, so they’ll also need to be trimmed. Inspect your Gutters Your gutters can fill quicker than you realize. Try to check your gutters at least twice a year to ensure they’re empty of debris. Full gutters won’t be able to properly flow water off of your roof and onto the ground. Water can pool on your roof and lead to damage. During a Hail Storm Once a storm arrives, try to be inside. Hailstones do damage to anything they hit, and it could be major. Try to stay inside while hail is coming down. Keep your doors and windows shut and your curtains drawn. Closed doors can’t be slammed shut and possibly broken by high winds. If your curtains are drawn then if a window happens to break the glass won’t spread very far. Moving to a level that isn’t directly below the roof is ideal as well especially during particularly nasty storms. After The Storm Hailstorms are dangerous. A three-inch hailstone travels up to 110 miles per hour! Hail of any size can do sizable damage to your roof so, after the storm has passed, you’ll once again need to check your roof for damage. You’ll need to make sure to hire the right roofing contractor. Some contractors wait for a storm to blow through an area and then try to scam unknowing homeowners. Make sure to do your research before you make any deposits. Hiring local ensures you’ll have a roofer that doesn’t seemingly vanish once the initial payment comes through. If a hail storm has passed through your area, Contact Honey Bees Roofing & Solar online or give us a call today at 817-668-6131 to schedule a free roof inspection!

How To Prepare Your Roof For Spring
Roofing, Roofing Maintenance

How to Prepare your Roof for Spring

Spring is here! The ice and heavy winds that winter brings may have damaged your roofing or filled your gutters. With spring showers on their way, you’ll need to make sure your roof is ready for the next stretch of weather. Honey Bees Roofing & Solar is here with the perfect tips so you can know exactly how to prepare your roof for spring. How to Prepare your Roof for Spring Clean the Gutters Over the course of the winter season, your gutters probably became clogged. If your gutters are full of twigs, pine needles, and other plant matter, then that water can do damage to your roof and even cause leaks. Cleaning your gutters should happen at least once a year, more if a large storm rolls through.  Make sure your gutters are installed along the roof, with downspouts to lead the water away from the foundation. If you want to avoid cleaning your gutters, consider getting industry-leading gutter guards to prevent debris from entering the gutter entirely. Look for Damage The winter weather can do a number on your roof. Make sure to look for any missing shingles or tiles. Some shingles may need to be replaced, such as if a shingle is smooth, buckling, or torn. Flashing is the material around chimneys, windows, and other vertical surfaces designed to lead water away from areas it can pool and into the gutters. Flashing that is torn, damaged, or even missing needs to be replaced. Damaged roofing materials need to be fixed immediately. If they aren’t, it can quickly lead to larger issues such as water leaking into your home and rotting wood integral to the infrastructure of your home. Check Your Attic It’s difficult to spot all roof damage from the outside. From inside your attic or crawlspace, check to see if there are any signs of roofing damage. Look for patches of standing water, damp support beams, or dripping water. Make sure to check along the peak of the roof when looking for leaks. Also make sure to look for mold, which is a sign of excessive buildup of water. Check for any sunlight coming in as well. Light can help identify holes in your roof that might be hard to find otherwise. Schedule a Roof Inspection The easiest way to get ready for the warm months is to get a roof inspection. Inspectors can expertly spot damaged or missing shingles and tiles. Also, they’ll find any leaks that your home might have, and be able to share additional information about your specific roof. Getting the help of a professional can help save you the time and hassle of trying to spot problems with your roof yourself. Before you know it, spring showers will be upon us and with some prep work, you’ll make sure your roof ready is for the season. Fixing and preventing damage will keep your roof in great condition for years to come. If you’d like to make sure your roof is prepared for spring, Contact Honey Bees Roofing & Solar online or give us a call today at 817-668-6131 to schedule a free roof inspection!

Honey Bees Roofing

525 E Bethesda Rd.
Burleson, TX 76028
Phone 817-668-6131

Support

Important Links

FAQ

Contacts

Contacts

(732) 262-3141
380 Birch Bark Dr
Brick, New Jersey(NJ), 08723


525 E Bethesda Rd.
Burleson, TX 76028
Phone 817-668-6131

Scroll to Top